This is a tutorial on how to implement a simple .NET console application for caching images in a local drive using IMemoryCache and how to use this cache service via Dependency Injection. For this tutorial, I am using .NET 6.0 and Visual Studio Community 2022.
Generally, this is what we are going to follow to accomplish this task:
- Define ImageObject class
- Implement ImageCacher class
- Call ImageCacher in Program.cs
You can download the project here.
Create Console App project
Open Visual Studio, create a Console Application and call it ImageCacherConsoleApp. For the Solution name, enter ProjectCache.
I won’t talk about the project creation in depth, but I do recommend reading my previous post called Start a New Project in Visual Studio 2022 and .NET 6.0 which describes how to create two projects within a solution. In that tutorial, I created an ASP.NET Core Web API application, and a Console Application.
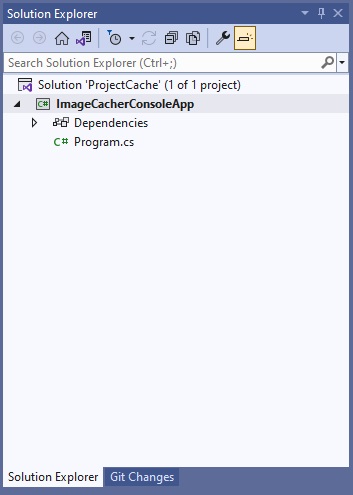
After you have created the project, your Solution Explorer should look like this:.
Create a directory for images
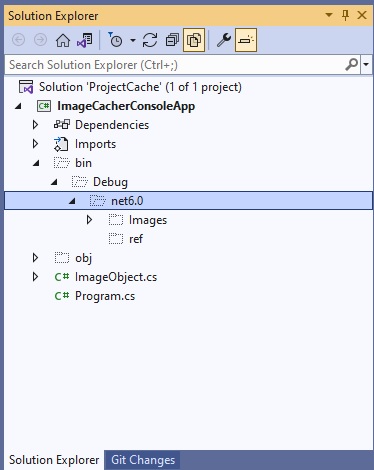
For sake of this demo, let’s put our images inside the bin directory as the application will search the images there. Specifically, create a folder called Images under the \bin\Debug\net6.0\ directory. Inside that folder, create at least one folder with some images in them. If you click the Show All Files icon on top, it will show you the bin directory and other hidden folders, as illustrated below, and the Images folder should be directly under net6.0.
If you have downloaded the project from the link I provided above, then you should be all set. The .net6.0 directory in that project should contain two folders with three images in each folder.
Define ImageObject class
Let us first define the ImageObject class. This class will contain all the information about the image that we will be caching later. To create a new class under the ImageCacherConsoleApp project, simply right-click on the project. Click Add. Click Class. Enter ImageObject.cs for Name. You will now have ImageCacher.cs under the console app.
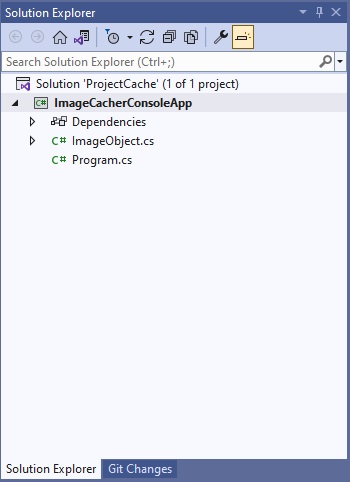
And this is what the newly generated ImageObject class looks like. It’s basically an empty class, which we will modify next.
using System;
using System.Collections.Generic;
using System.Linq;
using System.Text;
using System.Threading.Tasks;

namespace ImageCacherConsoleApp
{
    class ImageObject
    {
    }
}
ImageObject class will contain the following properties which are initialized through the constructor:
FileName– this is the full path of the image fileContentType– this is the file type such as JPEG, PNG, GIF, etc.Content– this is of data type byte[] or byte arraySubmitDate– this is the timestamp on which the file was created or modified on the server.
Our complete ImageObject class is shown below:
namespace CSCacher;
public class ImageObject
{
    public string FileName { get; set; }
    public string ContentType { get; set; }
    public byte[] Content { get; set; }
    public DateTime SubmitDate { get; set; }

    public ImageObject(string fn, string tp, byte[] ct, DateTime dt)
    {
        FileName = fn;
        ContentType = tp;
        Content = ct;
        SubmitDate = new DateTime(dt.Year, dt.Month, dt.Day, dt.Hour, dt.Minute, dt.Second, 0, DateTimeKind.Utc);
    }
}
The class really does nothing but receives and stores the values passed on from ImageCacher that calls it.
Also, C#10 now allows the use of file-scoped namespace as can be seen on line #1. It puts an end to namespaces using their own curly braces which in turn removes an extra nesting, which I think looks better.
That’s about it for ImageObject. We implement our ImageCacher class next.
Implement ImageCacher Class
This class is simple really. It has ImageCacher() constructor and a GetImage() method. GetImage() is where everything happens and to explain what it does, look at pseudo code below:
ImageCacher(IMemoryCacher memoryCache)
{
}

string GetImage()
{
    Get content of cache, if any, using file path as key

    if (content of cache is empty)
    {
        // Using file path, do the following
        Get file name
        Get image timestamp
        Get image type
        Read the contents of the file into byte array
        Store info into ImageObject instance

        Cache the ImageObject instance

        Return the message "Loading image from drive"
    }
    else
    {
        Return the message "Loading image from cache.
    }
}
The constructor will receive IMemoryCache via dependency injection. The cache can then be used throughout our controller.
GetMethod() simply returns a string that tells you whether the image requested was taken from the physical drive or from cache. Line #7 is where we check the content of cache using the file path as key. If it’s empty, then we load the image, and cache it. Otherwise, we just return what’s in the cache.
Complete source code is shown below:
using System;
using System.Collections.Generic;
using System.Linq;
using System.Text;
using System.Threading.Tasks;

using Microsoft.Extensions.Caching.Memory;

namespace ImageCacherConsoleApp;

public class ImageCacher
{
    IMemoryCache m_memoryCache;
    private ImageObject? m_imageObject;

    public ImageCacher(IMemoryCache memoryCache)
    {
        m_memoryCache = memoryCache;
        m_imageObject = null;
    }

    public string GetImage(string pickedImagePath)
    {

        string msg = string.Empty;
        if (File.Exists(pickedImagePath))
        {
            m_memoryCache.TryGetValue(pickedImagePath, out m_imageObject);

            if (m_imageObject == null)
            {
                // Read time stamp of file.
                DateTime ourFileDate = File.GetLastWriteTime(pickedImagePath);
                ourFileDate = ourFileDate.AddMilliseconds(-ourFileDate.Millisecond);

                // Open the file and read the contents into a byte array
                byte[] byteArray = File.ReadAllBytes(pickedImagePath);
                m_imageObject = new ImageObject(pickedImagePath, "image/jpeg", byteArray, ourFileDate);

                // Set cache options
                var memCacheEntryOptions = new MemoryCacheEntryOptions().SetSlidingExpiration(TimeSpan.FromSeconds(120));

                // Cache the image
                m_memoryCache.Set(pickedImagePath, m_imageObject, memCacheEntryOptions);

                msg = "Loading image from drive.";
            }
            else
            {
                msg = "Loading image from cache.";
            }
        }
        else
        {
            throw new FileNotFoundException();
        }
        return msg;
    }
}
On line #16, in the constructor, we get an instance of IMemoryCache via Dependency Injection.
On line #28, I read the cache content with TryGetValue() using the file path as the key, and getting the value back in m_imageObject variable. Here, we either get something from the cache(if it had been cached), or we get nothing. Technically, this method returns a boolean value – true or false. But you will notice that instead of checking the boolean return value, I check whether or not the value I get is actually null.
Line #32 to #46 is what we do if there was nothing in the cache. This is where we read the image into a byte array and store it in our cache.
On line #41, I first set how my cache should expire before I cache the image object. In that line of code, I set it to expire in 120 seconds, but you can set this to any value you want.
Line #44 is where we put our ImageObject into our cache. Its key in the cache is its path.
One final note about this is I throw a FileNotFoundException and the main program or whatever is using the ImageCacher instance should handle the exception.
And that’s our ImageCacher class. And now let’s call our ImageCacher from the main program!
Call ImageCacher in Program.cs
Our main program is Program.cs. Initially, the program contains a single line of code:
Console.WriteLine("Hello, World!");To be able to get our ImageCacher application working, we need to do the following:
- Install Microsoft.Extensions.Caching.Memory
- Install Microsoft.Extensions.Hosting
- Get an instance of
IMemoryCacheviaIHost - Call
ImageCachermultiple times with different image files.
To install Microsoft.Extensions.Caching.Memory, right-click on the project. Then click Manage Nuget Packages.
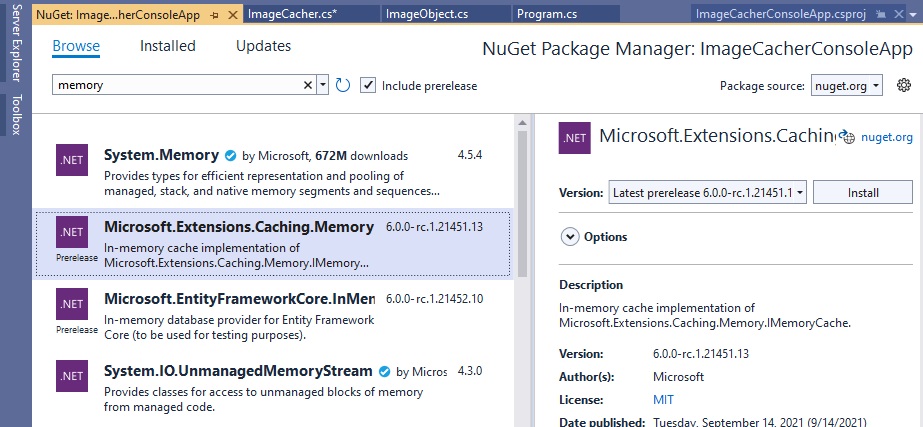
As illustrated above, enter memory in the search bar. Make sure you click Browse above it. Click on Microsoft.Extensions.Caching.Memory. On the right panel, click Install.
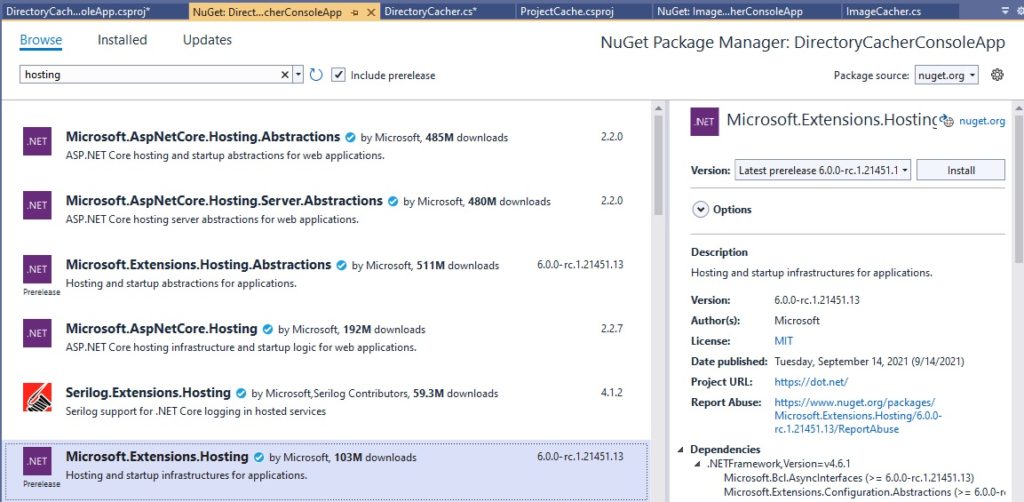
Do the same thing to install Microsoft.Extensions.Hosting. Enter hosting in the search bar to find it.
After installing these packages or namespaces, you are now ready to use. To get an instance of IMemoryCache, I followed what Microsoft Docs little tutorial on how to do for a console application.
To use the default IMemoryCache implementation, call the AddMemoryCache extension method to register all the required services with DI… The generic host is used to expose the ConfigureServices functionality.
They’re nice enough to provide a nice example for doing just that.
using Microsoft.Extensions.Caching.Memory;
using Microsoft.Extensions.DependencyInjection;
using Microsoft.Extensions.Hosting;

IHost host = Host.CreateDefaultBuilder(args)
    .ConfigureServices(services => services.AddMemoryCache())
    .Build();

IMemoryCache cache = host.Services.GetRequiredService<IMemoryCache>();

string image1 = Environment.CurrentDirectory + @"\Images\abstract\" + "timur-kozmenko-GS84KG8yNDo-unsplash.jpg";
string image2 = Environment.CurrentDirectory + @"\Images\abstract\" + "timur-kozmenko-VJj70LBdrnM-unsplash.jpg";
string image3 = Environment.CurrentDirectory + @"\Images\abstract\" + "timur-kozmenko-zxVdi0iEO7M-unsplash.jpg";

ImageCacherConsoleApp.ImageCacher imageCacher = new ImageCacherConsoleApp.ImageCacher(cache);

try
{
    // 1st Pass
    Console.WriteLine(imageCacher.GetImage(image1));
    Console.WriteLine(imageCacher.GetImage(image2));
    Console.WriteLine(imageCacher.GetImage(image3));

    // 2nd Pass
    Console.WriteLine(imageCacher.GetImage(image1));
    Console.WriteLine(imageCacher.GetImage(image2));
    Console.WriteLine(imageCacher.GetImage(image3));
}
catch (Exception ex)
{
    // Do something
}
Line #5 and line #9 shows you how to get an instance of IMemoryCache through Dependency Injection (FYI: this is done differently in a web-based application as you will see in my later posts).
Line #11 to #13, we hard code the path to our test image files.
Line #15, we create an instance of ImageCacher .
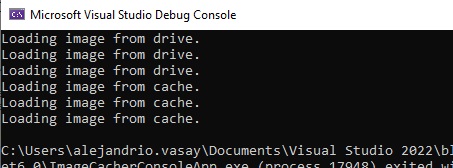
Line #18 to #20, I call the GetImage() method and pass it the image path. At this point the messages should say I’m getting the images from the drive (not cache).
Line #23 to #25 is the second pass, and every call to GetMethod() should say I’m getting the images from the cache.
Running the application
Hit F5 to run your application. You should get something like this:
Conclusion
This is a simple image caching tutorial using the new .NET 6.0 and Visual Studio Community 2022. The application demonstrates the use of IMemoryCache service for caching in a console application. This tutorial demonstrates how to use the Hosting extension to be able to add MemoryCache in the services collection, and get it ready for use. This also demonstrates how to use Dependency Injection in the application constructor to be able to get an instance of IMemoryCache.
